Creating and Editing Menu Items
Feature | Action | Description |
Access | Navigate to Menu > Create New Item or select an existing item to edit. | |
Menu Information | Set Name, Price, Category, and Description. Use 'Original price' for strike-through promotions. | Defines the item's core identity and pricing structure. |
Additional Information | Set as Featured item (visible on the homepage). Add SKU (optional) and Care Instruction Note for consumers. | Controls visibility and provides important usage/storage details. |
Media | Upload up to 5 Images (1:1 square format, min 480x480 pixels). Add up to 2 Video URLs(TikTok/YouTube direct links only). | Provides visual presentation to customers. |
Store Availability | Check the boxes for stores where the item is Available. Unchecked stores will hide the item. | Controls branch-specific item visibility. |
Preparation Time | Enable and set time (in hours/days). Items exceeding a certain preparation time are marked as "Pre-order". | Ensures users cannot check out if the time frame is less than the required preparation time. |
Custom Availability Dates | Set a Start Date and optional End Date for the item to appear on the store page. | Used for seasonal or limited-time offerings. |
Recurring Inventory Limit | Enable and set daily maximum quantities for each day (Monday–Sunday). Can also set custom limits for specific stores. | Sets a consistent stock cap that automatically resets weekly. |
Managing Add-on Groups (New)
Add-on Groups are used to define a set of mandatory or optional choices (like size, flavor, or extras) linked to a specific menu item.
1. Create a New Add-on Group
Access: While editing a menu item, locate the ADD-ON GROUP section. Click 'Add new group' (Image 1).
Group Information (Image 2):
Enter the Add-on Group Name (e.g., "Patties").
Set Minimum Selection and Maximum Selection (e.g., 1 and 1 for a mandatory single choice).
Add-on Group Items:
Click 'Add Item' to select the individual add-ons that belong to this group (e.g., beef patty, chicken patty).
Finalize: Click 'Submit' to save the new group.
2. Copy an Existing Add-on Group
Access: In the ADD-ON GROUP section, use the 'Copy from other menu' feature (Image 1).
Select the source Category and the source Menu item (e.g., 'Coffee Club Premium Package').
Click 'Copy' to duplicate the group structure to the current item.
Item Sequence (Re-ordering Display)
This allows merchants to control the visual order of items within a category using drag-and-drop.
Navigate to Menu > Item Sequence.
Select the desired Category.
Drag and drop item tiles to re-order the menu sequence.
Click 'Save sequence'.
Item Inventory Limits (Temporary Stock Control)
This feature is used to temporarily override the inventory for specific dates and branches.
Navigate to Menu > Item Inventory Limits.
Click 'New setting'.
Specify the Date or Date Range and select the target Branch(es).
Select the menu item and enter the custom inventory limit.
Note: Entering '0' marks the item as 'Sold out' for the specified period.
Click 'Continue' to save. (The inventory resets to default after the specified dates).
When setting a temporary item inventory limit, merchants must be aware of how this new setting interacts with existing limits.
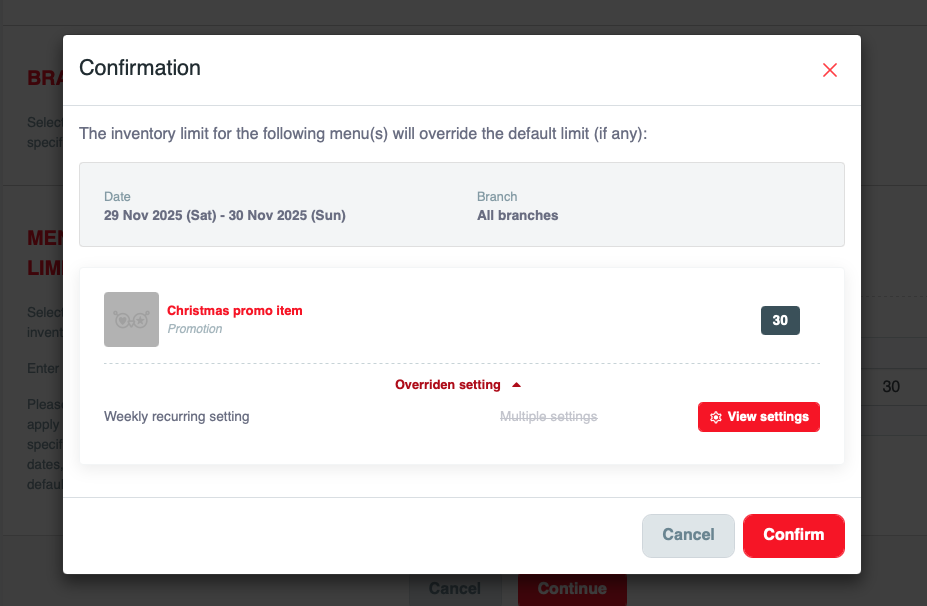
❗ Important Note on Inventory Override:
The temporary inventory limit you are setting for the specified date range (e.g., 29 Nov 2025 - 30 Nov 2025) and branch(es) will override the default limit (if any) for the affected menu item(s), including any Weekly recurring setting.
You can view the details of the existing overridden settings by clicking the 'View settings' button on the confirmation screen before finalizing the temporary limit.