Step-by-Step: Creating Category Availability
Step 1: Access the Page
Log in to your Admin Portal and navigate to:
Menu Management > Category Availability > Create New.
Step 2: Define Availability (Date & Time)
This section determines when the category appears on the website
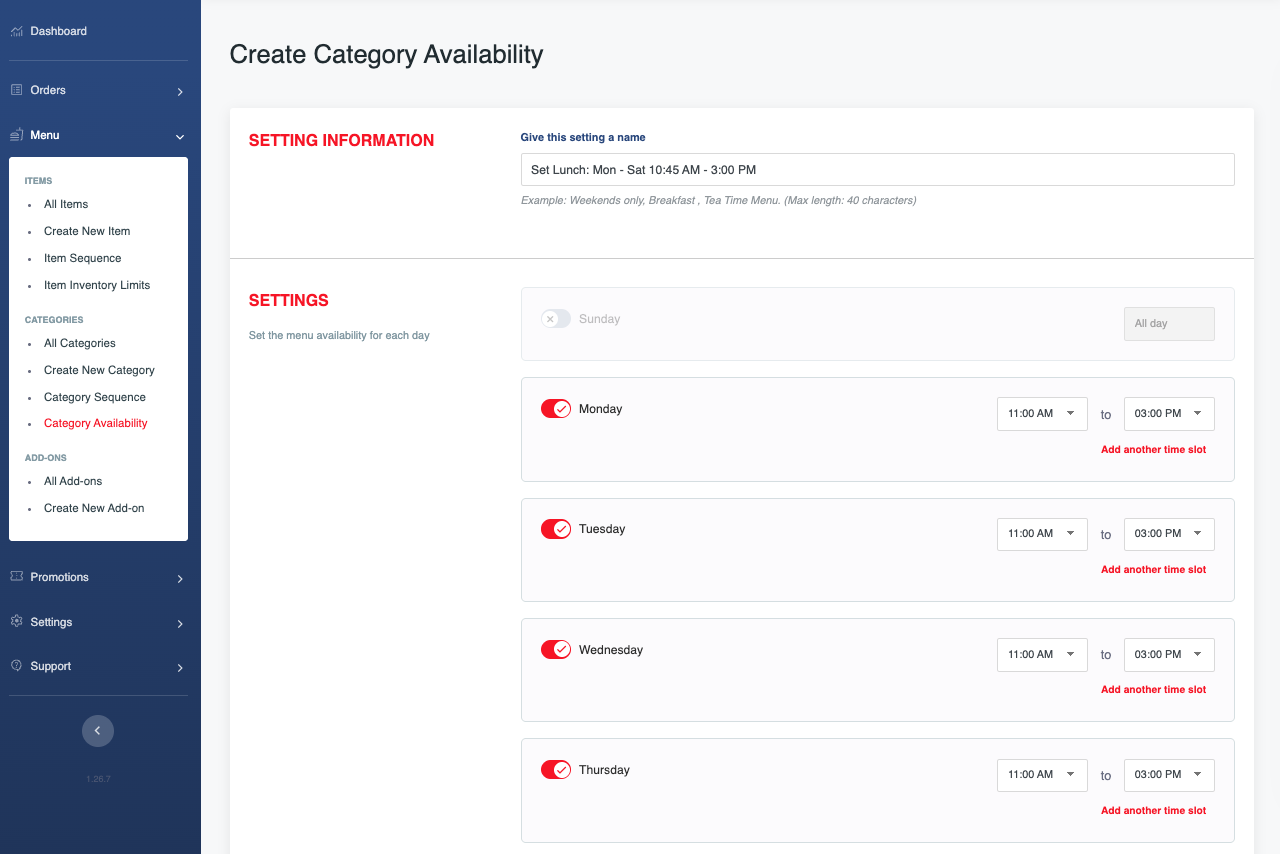
Availability Name: Enter a recognizable name for this rule (e.g., "Lunch Specials - Weekdays") so you can easily identify it in the management list.
Daily Status & Time Slots: Toggle the specific 'Day' to Active for every day this menu should be live. Once active, define the Time Slots (Start and End time) for that specific day. Set a day to Inactive if the menu should be hidden on that day.
Recurring Days: Tick the boxes for the days of the week this category should be visible (e.g., check only 'Saturday' and 'Sunday' for a Weekend Brunch category).
Time Slots: Input the Start Time and End Time.
Example: For a "Dinner Only" category, set it from
18:00to22:00.Note: If the category should be available all day, set it ‘All day’.
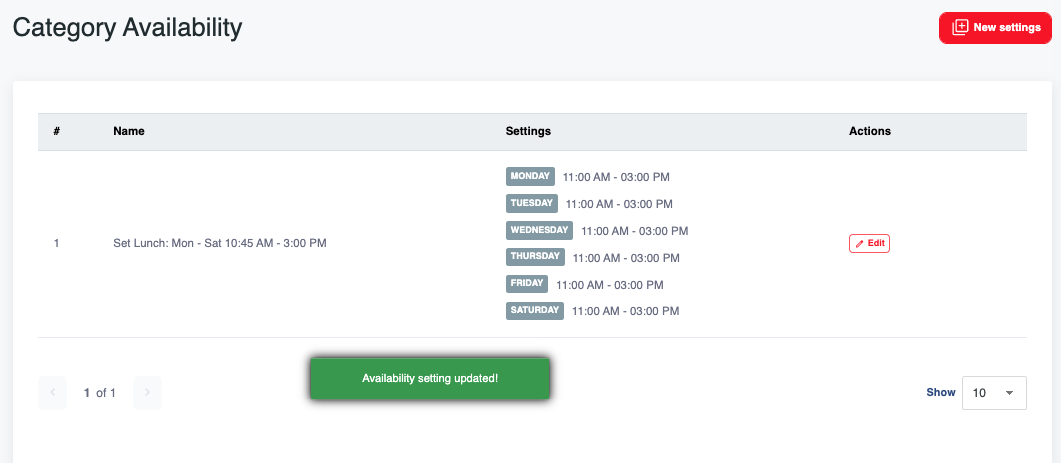
Step 3: Review and Save
Double-check: Ensure times do not overlap in a way that would confuse the system (e.g., two different rules for the same category at the same time).
Save: Click the "Submit" button at the bottom of the page.

Admin Pro-Tips:
The "Hidden" Trick: If you want to temporarily hide a category manually without deleting the settings, simply toggle the Status to Inactive in the category management list.
Verification: After saving, open the customer site and refresh the page to ensure the category appears (or disappears) according to your new schedule.
Hierarchy: Remember that if a Category is hidden, all Items inside it will also be hidden, regardless of their individual settings.